

Step-by-Step Guide
REQUIRED MATERIALS
Esse é um parágrafo. Clique em "Editar texto" ou clique duas vezes na caixa de texto para editar o conteúdo e adicionar informações relevantes para compartilhar com seus visitantes.


Adequate Lighting
Cutting Mat
White Glue
Sharp Craft Knife
Tweezers
Stainless Steel Ruler
SCALE MODELING TUTORIAL
Have the Paint.NET program
Convert the PDF files received from the website into PNG files
Watch the video provided below. This video was recorded by Seffm, and it explains in detail how to adjust the correct scale for your model. My thanks to him for allowing it to be shared on the website.


The procedure shown below applies to all models available on the website and in the community
Model used as an example - One Bunker Hill Building
STEP I
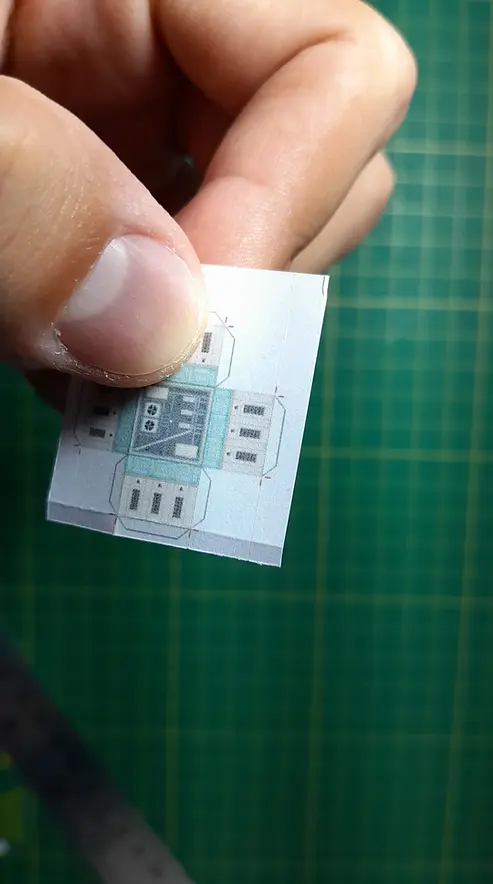
Take the model you want and cut the piece you will start with.
STEP II
Using the red lines as a reference, place a ruler from end to end to mark a straight line with the craft knife. Remember, we don’t want to cut through the paper completely; just run the knife lightly to score the line where the fold will be made.
STEP III
After scoring the fold lines, cut away the remaining paper that won’t be used. Be careful not to cut the tabs that will be used for gluing.
STEP IV
Alright, we’ve now reached the blue lines. They serve the same purpose as the red lines, but are used to mark lines on the opposite side of the paper.
STEP V
Next, take the piece with the blue lines and make small perforations along these lines. Once marked, flip the paper over and lightly score a straight line from end to end using the ruler and craft knife.
STEP VI
Now, after marking all the lines in the correct areas, fold the necessary parts and then trim the excess paper that won’t be used.
STEP VII
Repeat these same steps for the remaining pieces, carefully marking and cutting each one.
STEP VIII
Now that you have cut and separated all the pieces, take some glue and start gluing them. Remember, too much glue can stain the paper. Use a toothpick to apply the glue to the tabs.
STEP IX
Once the separated pieces are glued, start assembling the final model.
STEP X
Add details like antennas and trees to the model, and it’s done!